Thecus N4200取得root權限,開啟ssh連線
 SYSUSER模組:http://naswebsite.com/wiki/Thecus_N5200_Module:_SYSUSER
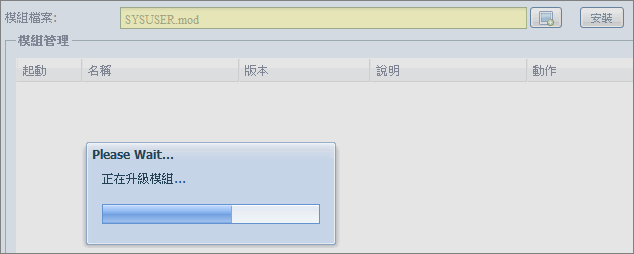
本站檔案下載:n5200_sysuser_2.00.02.zip從網站下載下來就是一個壓縮檔,安裝模組時選擇壓縮檔內的「SYSUSER.mod」的檔案即可,按下安裝即會開始安裝模組。SYSUSER的模組會幫你建立一個sys的使用者,uid與gid都是0,等於系統內的root權限,取得權限後就可以操控整個系統。
 SSHD模組:http://naswebsite.com/wiki/Thecus_N5200_Module:_SSHD
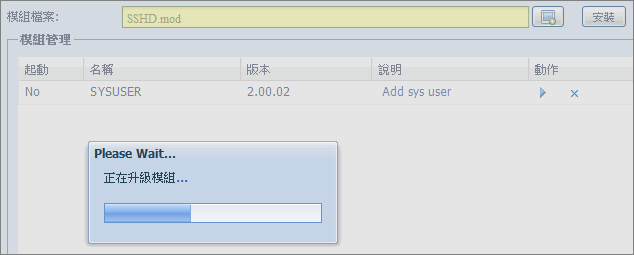
本站檔案下載:n5200_sshd_2.00.00.zipSSHD模組主要是開啟sshd的服務,既然都取得root權限了,當然要登入一下囉!若是了解Linux系統或是一些Embedded System,登入進去是非常有趣的一件事情,甚至自己可以達到更多想要的功能。
 模組安裝後並不會主動啟動,此時可以按下箭頭啟動模組。
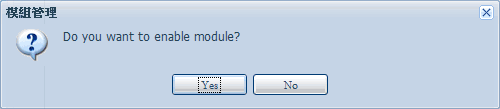 啟動時的確認,當然選「Yes」
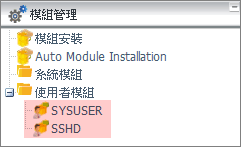 啟動模組過後,左方的模組選單就可以看到「SYSUSER」與「SSHD」,點選之後即可做設定。
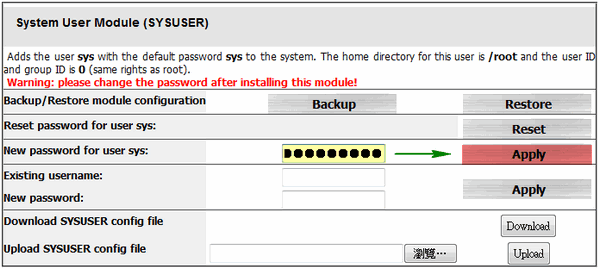 SYSUSER的模組最主要就是要先「改密碼」,這樣自子才有辦法取得最高使用者的權限,直接在「New password for user sys」後方欄位輸入一組密碼,點選Apply。
 設置完成後會看到如同上圖一樣的訊息,依照naswebsite的文件,建議將原本存在於系統上的用戶都更改密碼。
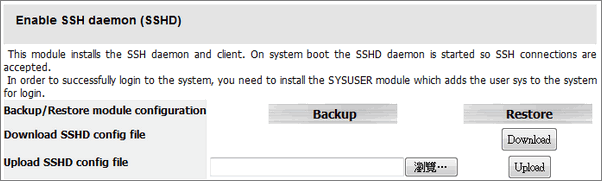 SSHD啟動後就不用再做設定,模組頁面只提供備份及還原設定檔的選項。
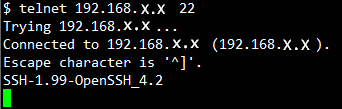 ssh預設listen 22 port,telnet試試看果然有通唷!雖然說ssh版本舊了一點,但是能登入最重要啦!
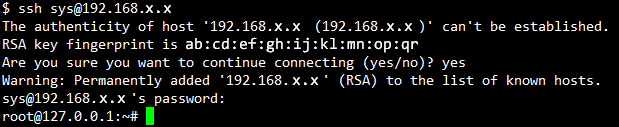 ssh登入系統可以使用sys的帳號,因為uid為0的原因,因此帳戶名稱顯示root,不過使用root還是無法登入的唷!若是有需求修改root密碼,請在輸入「passwd root」修改,這樣就大功告成了!