你知道「兩步驟驗證」的重要性嗎?它有著帳號「第二道盾牌」之稱,我們帳密被盜時,有設定「兩步驟驗證」的朋友就能大大降低帳號被入侵的風險,連 Google 都宣布未來要強制使用者設定,這樣你還不知道「兩步驟驗證」的重要性嗎?那小編再告訴你 iOS 15 之後,所有
iPhone 都直接內建了「兩步驟驗證」功能,不需要另外下載 Google Authenticator 也能輕鬆完成驗證,趕快花 1 分鐘讓小編教你如何設定 iPhone 裡的二階段驗證,提昇自己的帳號安全吧。
小編以設定 Google 帳號的二階段驗證作為示範,這邊用電腦+手機的配置比較好操作,首先用電腦
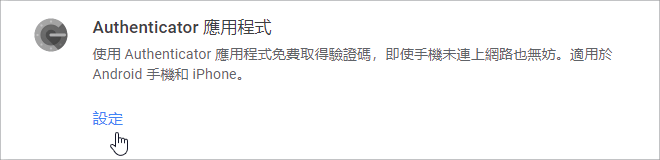
開啟 Google 兩步驟驗證碼設定,找到「Authenticator 應用程式」下方的「設定」。
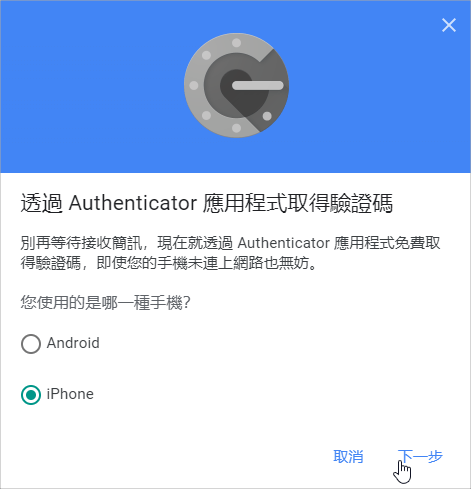
然後選擇 iPhone 點擊下一步。
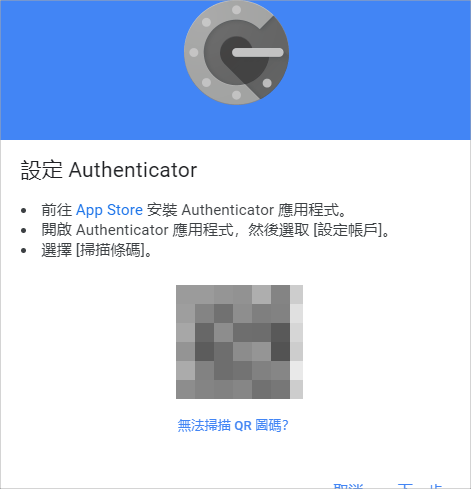
在這個步驟就可以看到 QRCode 畫面,此時拿起手中的 iPhone。

打開「密碼」>找到 「Google 帳號」點擊進去。
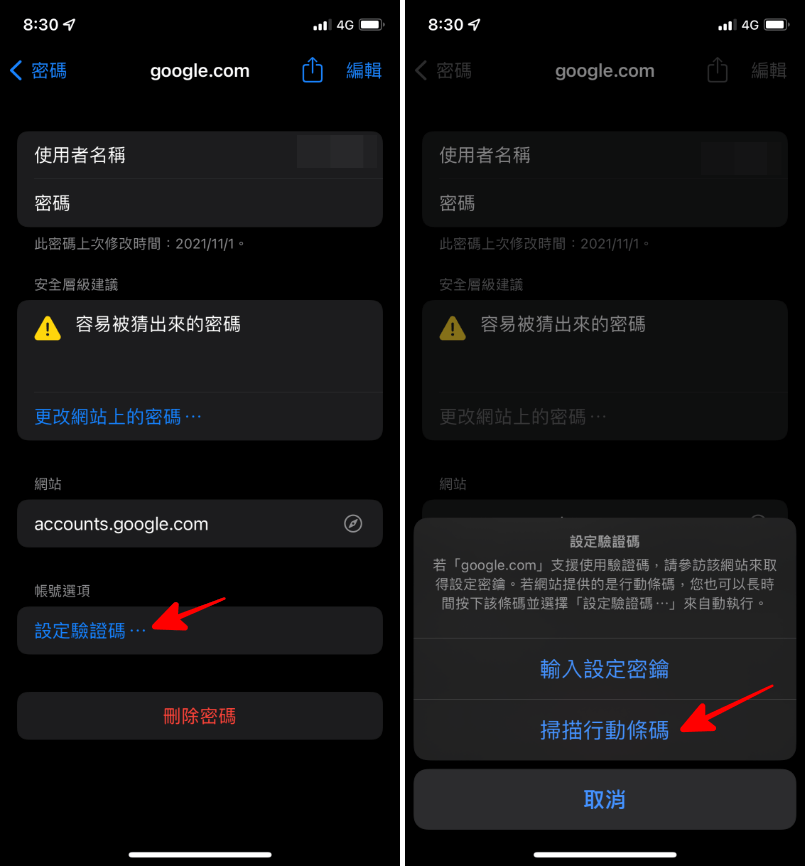
下方點擊「設定驗證碼」>「掃描行動條碼」,接著把鏡頭對準螢幕,掃描剛剛出現的 QRCode。
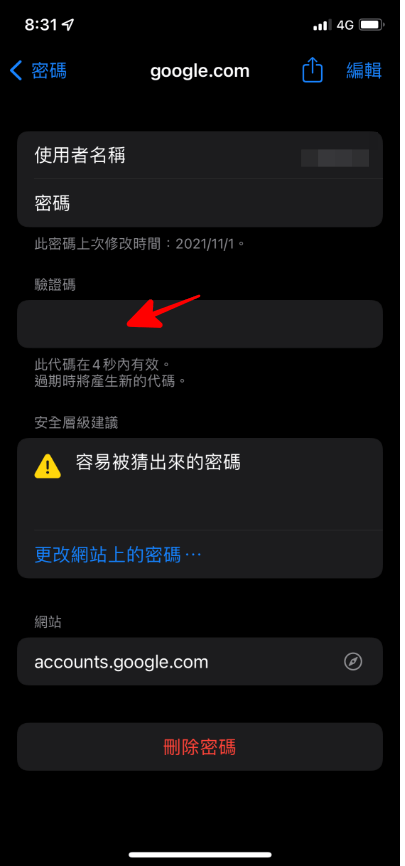
接著就會在 iPhone 驗證碼欄位看到 6 位數的驗證碼囉,上圖由於 iPhone 安全機制截圖沒有顯示出來。將上面的 6 位數驗證碼輸入在電腦 Google 驗證畫面中,按下完成就大功告成啦。
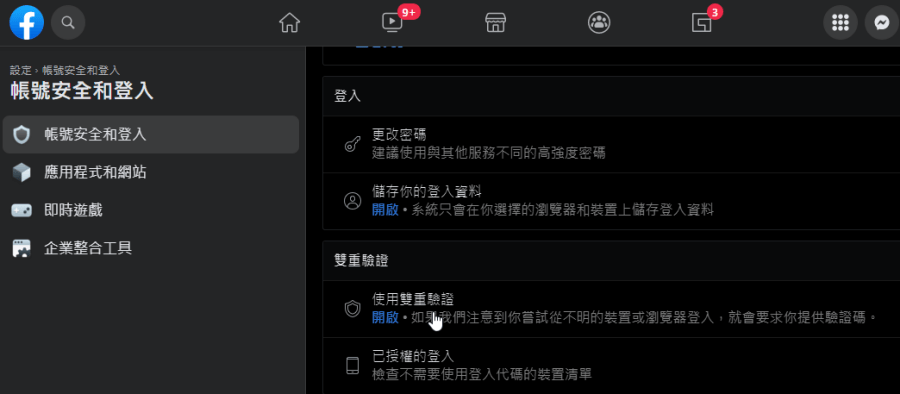
剛剛是以 Google 作為示範,我們也可以在臉書,甚至是最近很紅的區塊鏈貨幣交易平台,透過這樣的方式來加入「兩步驟驗證」到 iPhone 內建的功能中,這樣一來不需要下載 Google Authenticator 也能輕鬆幫帳號安全升級啦。